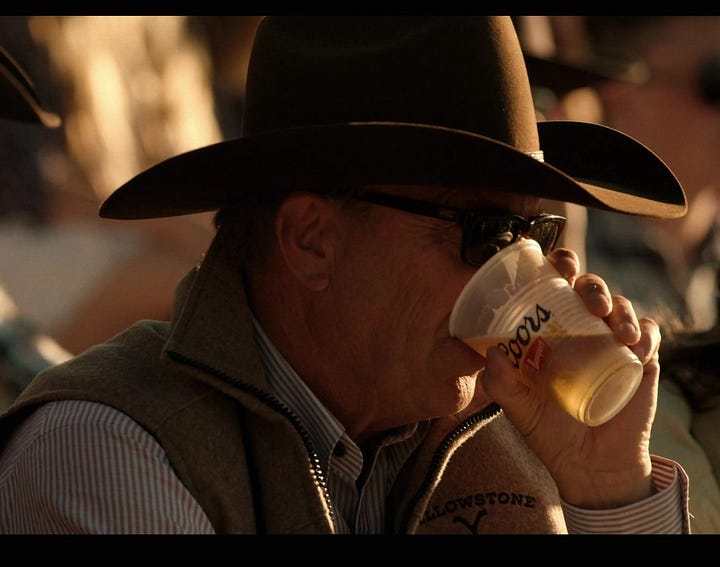
On a recent trip to the grocery store, John and I came across a large cardboard display just between the produce and beer aisles. In bold white type, the ad encouraged us to “Live Like a Dutton”.
Indeed.
If you haven’t seen the show this ad refers to, Yellowstone features a number of characters of spurious morality that are no monuments to justice, especially after they’ve been drinking. The Coors promotion seems like really bad advice, unless you’re looking to get branded on the chest with a hot iron or taken to the “train station”.
No thanks.
Nevertheless, every now and then as we’re working on the farm, dust stuck to our sweating faces and grit in our teeth, John and I stop to ask… Are you feeling like a Dutton yet?
Well, maybe like a Dutton ranch hand…
Most jobs around here are dirty jobs, varying only by degrees. So far in May, it seems we’ve both been using grime as our sunscreen as we work on fencing.
Recently, John and I raced against the clock to get an additional ring of fencing around the house before the cows came up the mountain. Last year, they were here on May 10th (we wrote it on the calendar) and cows are nothing if not predictable.
It was May 7th before we could get to fencing and we spotted a herd in the distance on May 9th. Tiny as ants, each day they came closer, becoming larger and louder, bellowing in the distance as we worked.
Once cows are in your pasture, getting them out is no easy feat - we were motivated.
This was the view from our backdoor in 2021, before we repaired the existing fencing that was around the house back then.
As bad as this looks, remember they also smell. Bad. Like cows.
If you’ve never lived around cows, you might not know the damage a curious cow or calf can impose on your property. Not only do they poo everywhere (which attracts flies of all sorts), but they rub up against (and lick) cars, lawn furniture, tractor equipment - whatever.
They also trample everything that’s on the ground, usually after they put it there.
And they’re not even our cows!
We lease some our land to a local rancher who has thousands of cattle. In return, we get a (small) break on our property taxes - it’s not much of a trade, so why do we do it?
Well, one of the benefits of having cattle graze means less mowing for us. Keeping the grass short reduces the fire hazard. Fire is a real threat here and cows eat a lot of grass so, in that way, they’re helpful.
Regardless, John and I decided last year that we would decrease the area we allow them to graze by adding more fencing and a couple additional gates. This additional fencing will keep them further away from our house and gardens. We added a new well last spring and we’re adding pea gravel around the house this spring, so we’re mitigating fire danger in other ways.
Here’s the challenge: cattle know no boundaries. They go where they want. You may have the newest, toughest, sharpest fence installed and, if a cow sees something it wants on the other side, it will go right through. If it gets spooked, it will go through. If it sees water, it will go through… you get the idea. And it’s never clean. It doesn’t go over or under or between the strands of barbed wire - it just runs straight through, taking out posts, wire, and maybe even part of itself in the process.
Yes, cows are a lot like Steve McQueen in the Great Escape… they really want to get to the other side and they go for it.
The best you can do is build the strongest fence you can and maintain it. Monitor it for loose wires, fallen trees, loose posts - assure it stays solid.
But first, you must build it.
Before moving here, neither of us knew very much anything about fencing. Who pays attention to fencing? We started learning just by repairing what was here and then last spring John installed an 8’ deer fence around the garden.
Typically, we learn best by doing which means we also learn a lot about what not to do through trial and error. So, I’ll share both the do’s and don’ts with you here, in case you, too, need to build a fence for the first time.
First of all, there are so many correct ways to build a fence. If it works, it’s correct. This is just how we do it.
The first question to answer before starting is pretty basic: Are you trying to keep something in or something out? And how large is the creature you are restraining?
These questions will determine the materials you’ll need. In our case, as you know, we’re keeping out cattle - lots of cattle (cows, calves and bulls) - so we’re using barbed wire. You may be using rolls of fencing in your project but the basic concept is the same.
Here are some basic tools we use. Yours may differ slightly.
T post clips
Double-barbed galvanized staples
Fence Stays
Hammer
Fence tightener
High tensile steel double barbed-wire, 4” apart
Manual T-Post driver
Plumb line
Fencing pliers
Barbed-wire spool handle (spinning)
Setting Posts
The first step in fencing is to set the posts. We opted for 5” round wooden fence posts that are 6’ tall, buried 2’ deep. John used a manual post hole digger to set the posts at the corners, where we had elevation changes, and approximately every 200 feet.
He used his iron rock-buster bar to break up the rocks he came across when digging (and there were a lot!). This hefty tool has come in handy so many times!
We made sure the posts were straight using a level and then set them with cement in the high pressure points (at gates and where the cattle like to push), and backfilled others that weren’t high pressure points.
Corners
Corners are the first to set with three posts per corner and two cross-braces to stabilize the corner posts.
Each corner needs a tension wire so that when a cow, for instance, pushes against the fence further down, the force doesn’t pull the corner post out of the ground. The tension wires can be tightened using any fulcrum… just make sure it’s long enough to stay put once tightened.
We use a lot of bones as fulcrums. They’re plentiful around here and they last a long time.
Make sure your posts are set (in cement or backfilled well) before you tighten the tension wire or your post will get pulled straight up out of the ground!
Never mind how we know that. :-)
T-Posts
After finishing the first corner of posts, we stretched a plumb line to the next corner to fix a straight line. John used a manual T-post driver to set T-posts along this line at 15’ intervals.
The T-posts are 6.5’ tall, heavy-duty steel, buried 2.5’ deep. They have excellent vertical strength, but need to be stabilized horizontally because, when forced, they can wiggle. This is why you need to have wooden posts every so often - for stability.
Running Wire
After all your corners, your wooden posts and T-posts are in place, you can start running wire (or other fencing). We opted for four strands of double barbed wire spaced 12” apart.
Barbed wire comes in rolls that weigh about 80lbs each. While 80lbs might not sound like much, it’s a spool of sharp metal that has to be unrolled as you work. Depending on the area you’re fencing, you might be able to rig the spool to your tractor or SXS but, in our case, we were fencing areas that were both tight and steep. This meant John had to carry the roll in one hand as far from his body as he could while I pulled down on his other arm acting as a counter-balance (and moral support!).
At first, we tried putting the roll in the back of the SXS but it wouldn’t unroll. Then we tried with John in the back of the SXS and me driving along really slowly on the hill as he manually unrolled the barbed wire, but that almost ended badly, as it’s a steep hill. Finally, he bit the bullet and just carried the spool using the little swivel handle.
I tried reassuring him that the spool was getting lighter with every step as it unrolled… but I don’t think that helped much.
Anyway, starting at the first corner, we wrapped the end of the barbed wire around the post and stapled it there then continued running the wire to the second corner.
At the second corner, we pulled the slack out of the wire as best we could before cutting it. It’s important to make sure you have firm hold of the wire. It’s springy and can snap back and bite you with its barbs if you aren’t very careful.
Put the cut end of the wire in the fence tightener and pull the strand tight against the post before wrapping the end of the wire around the corner post and fastening it with a couple staples.
It’s really important to attach the barbed wire to the side of the T-post the cows are on. As I mentioned before, cows like to rub on things and they’ll rub on T-posts and push them over if the barbs are on the wrong side.
They might do it regardless, but the barbs will be a deterrent.
The next step is to attach the barbed wire strand to the T-posts using T-post clips. Decide what spacing you’ll have between strands and then attach the strand to each T-post using even and consistent spacing.
Attach the T-post clip above one of the T-post notches and use the fencing pliers to curl the ends, pulling the clips tight around each T-post. This will hold the barbed wire strands in place.
You can also insert fencing stays for more stability or to reduce the number of T-posts you use. We spaced our T-posts at 15’ intervals but, depending on your situation, you could space them farther apart if you use more fencing stays.
A fencing stay is a long, double-helix looking wire fixture that increases stability and keeps the barbed strands in place. They keep animals from going between the strands of wire.
To install, start from the top wire and, while holding the fencing stay perpendicular to the first strand, slowly feed the stay downward by rolling it between your palms and letting it twist over the strands.
These stays aren’t mandatory, but a fence is stronger with them than without them.
Repeat
After running that first line of barbed wire, you start all over again and run another. Then another. Then another… And when you finish with that section of fencing, you move on to the next and so on until you finally come full circle.
Luckily, about half of the area we were enclosing was already fenced, it just needed repairs. In total, we enclosed about 10 acres through pasture, up and down hills, and through bramble and trees. I left out the part where John cleared the actual fence line through an aspen grove last fall…
Clearing a path through the land comes before any fencing can even start.
Gates
I’m very excited about our new gate, which will soon open automatically, powered by a small solar panel! What luxury!
Our new gate is a 12’ heavy-duty 2” tubed steel gate. Unlike fencing, we’ve installed a lot of gates through the years. We usually install the gate posts 6” wider than the gate, then use a latch or chain to keep the gate closed.
We have several gates around the property and we keep some of them shut year-round. We’ve learned that, in winter, the posts tend to move a bit making the latches ineffective. In spring, the posts go right back into place as the weather warms so there’s nothing to be done, really, except use a chain during winter.
We have also learned through experience that, while a Masterlock will freeze in winter, a cable lock doesn’t. Just a little tip.
Gates should be leveled by adjusting the bolts that run through the posts. It’s important to get the gate level so it stays put when you open it. Also, be sure the hinges are facing the right way (up/down), depending on the type of gate you buy. I’ve seen a few gates installed so that someone could just lift it right off the hinges. Don’t be that guy.
If you don’t want to buy a gate, you can create a gate using your same fencing materials. It’s a good option for areas that get little egress or are too tight to fit a gate.
Create loops at the top and bottom of a nearby post then insert the post of a loose, flexible panel of fencing into those loops to secure the gate. This method isn’t as strong as a metal gate, but it fits the bill in many circumstances. This one is across our fireline, for instance, which we rarely open.
Over the past couple weeks, we’ve installed and repaired a lot of fencing and learned a lot while doing it. We’ve gone through 3 spools of barbed wire, two pairs of leather gloves, and more than a few band-aids.
Fencing is the kind of project that’s rare and, hopefully, one and done - requiring only occasional maintenance from here on out. I, for one, am glad to see it in the rearview mirror and I don’t think John is going to miss digging post holes, either. Or dreaming about them…
Knowing what we do about cows, we can only do so much to keep them out but it should work. After all our efforts, if the cows are still determined to break through, there’s always a Plan B waiting… Henry.
Hi Greta,
I hope this isn't intrusive. I originally wrote this message to you back in 2022 and the email bounced back. I'm the person who acquired "Thou Art That" from you back in 2020. Then my husband obtained another piece. Anyway, I wanted to reach out to you and let you know how grateful I am to have your art in my home and life. "Thou Art That" is one of the first things I see each day, and it brings me so much delight and comfort.
One of the things that moved me to write this is that I went online to see what's been inspiring you lately and I couldn't find your original websites. I am glad to have found your Substack. Again, this might be odd coming from a stranger, but as a writer I know firsthand how challenging the pandemic has been to creative people. So I just want to affirm your genius and insight. Every day I find something special about the way your work plays with light. It connects to the divine in a very special way and I wanted you to know that.
So I am glad that you are still creating -- for yourself, above all.
Best wishes to you.
this fellow wrote a nice poem about fences, I connected him to you and now you to him ok. best
https://robert94015.substack.com/p/gone-are-the-white-picket-fences